
Saturday, December 6, 2014
Wednesday, December 3, 2014
Mini Art book
A few weeks back I created a mini art book. I took pictures but I never posted it to my instagram, Facebook, etc. What's wrong with me. TIME, TIME, TIME. There seems to not be enough of it. I hope to change that mindset though and always make time to create and to share. I know my crafty friends out there will hold me to it. Right?


Monday, December 1, 2014
Recreating Myself

This is just how I've felt for the last five or so months. Just like this bird with it's head stuck in the sand. My blog has seen no activity and my creativity seems to have disappeared as well. I have not lost all of it for I still surf the web looking for inspiration but that really didn't excite me like it use to. It appears that I had lost the love for crafting that I once had. So what made me lift my head above ground(creatively speaking) again. I don't know. I just know that something told me I had to do something. The first thing I did was to redesign my blog and then I started posting on my instagram site again. I thought what the heck if most of my friends are not crafters, maybe I'll make a few new crafty friends. So here is goes, DECEMBER 1, 2014, and what am I determined to do? For one thing, not let what others do squash my creativity and two, continue to create no matter what.

Monday, July 21, 2014
"Because I'm Happy"
Who doesn't want to be HAPPY? And who doesn't like to receive some HAPPY MAIL? I recently became engrossed with this art form. It is quite fulfilling to gather and embellish some of these lovable and mailable crafty things. It is also quite a big deal to receive some as well. So here are
some things that I do prepare to send some of these out.
I usually save business type envelopes that I receive in the mail. I disassemble them, turn them inside out and reattach them. Then I hit them with the paint and embellish until there is no end.

I intend for these to be pockets to use in art journaling projects.


Next I use a large 9x12 envelope and hit it with the paints and embellishments(most of which are homemade). I also sew up a paper sack to hold the "goodies".

Finally, I seal everything inside the large envelope and add the addresses to the outside and send it on it's way. I get such a HAPPY feeling when I do this. The whole process is so fulfilling. And even if I don't receive a "Thank you so much", I keep on sending out these little pieces of happiness over again and again. After all it's not about receiving , it's all about the giving. Have you felt that HAPPY feeling lately? If not, then why not join the rest of us and send out some HAPPY MAIL of your own.


some things that I do prepare to send some of these out.
I usually save business type envelopes that I receive in the mail. I disassemble them, turn them inside out and reattach them. Then I hit them with the paint and embellish until there is no end.
I intend for these to be pockets to use in art journaling projects.
Next I use a large 9x12 envelope and hit it with the paints and embellishments(most of which are homemade). I also sew up a paper sack to hold the "goodies".
Finally, I seal everything inside the large envelope and add the addresses to the outside and send it on it's way. I get such a HAPPY feeling when I do this. The whole process is so fulfilling. And even if I don't receive a "Thank you so much", I keep on sending out these little pieces of happiness over again and again. After all it's not about receiving , it's all about the giving. Have you felt that HAPPY feeling lately? If not, then why not join the rest of us and send out some HAPPY MAIL of your own.
Thursday, July 3, 2014
Exploring.....
Here it is July already. My summer vacation is half way over. Ba Humbug! And yes, you would think that I could keep my blog up-to-date, but I haven't. Tisk. Tisk. Well anyway, you can find me over on FB most of the time. LOL
Here are a few things I worked on today using The Explore. I created a gift and "handmade by" tag to go on a gift that I made. The gift/paper bag was not cut with the Explore. Then I took a dollar store gift bag and cut it down and adhered the handle part inside the bottom part. I then used the Explore to write my name and "created by". The image is from one of the Imagine images.


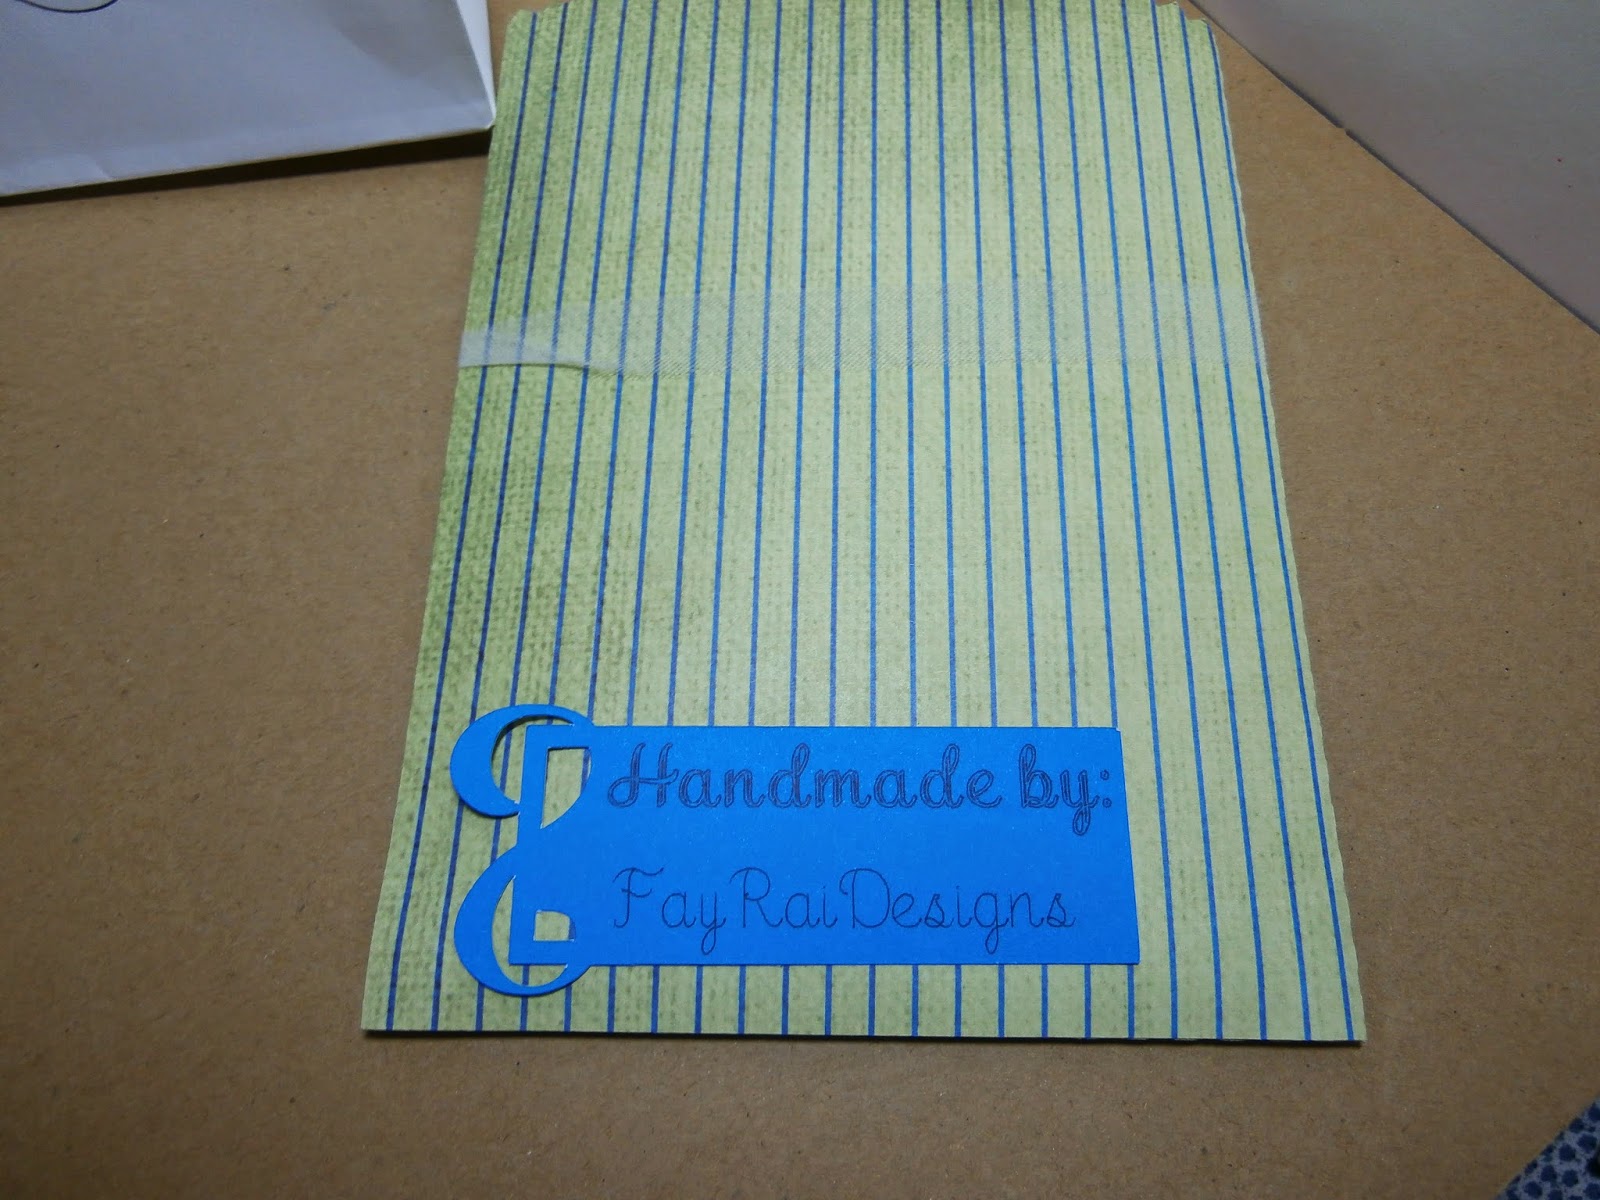

Here are a few things I worked on today using The Explore. I created a gift and "handmade by" tag to go on a gift that I made. The gift/paper bag was not cut with the Explore. Then I took a dollar store gift bag and cut it down and adhered the handle part inside the bottom part. I then used the Explore to write my name and "created by". The image is from one of the Imagine images.
Monday, June 23, 2014
Addressing envelopes with the Cricut Explore
Let's Make it Personal
And I'm doing just that and enjoying it while crafting with the new Cricut Explore. Let's just say that I am EXPLORing new possibilities. LOL. I know what you maybe thinking, "Oh no, not another Cricut" Well, I did take the plunge again and so far, so good. I especially am quite satisfied with the writing feature this machine has. For my post this month, I made a few samples to show you how you can personalize many of your crafty projects or gifts. Let's start first with a few handmade bags that I cut and also wrote my name and a sentiment on.

Next, I designed some business cards and address labels. Here's what I did to create the business cards:
First, I found some frames that I owned and placed them on the Design Space canvas

Then I made sure the shapes could be ungrouped so that I could create two layers: one for the written part and one to coordinate as a bottom layer.

Next I choose a font and added it to the top shape. You can use
true type fonts with this machine.


And here is the finished project and some address labels. I basically
did the same thing with the labels( sorry, I had to cover up my
address.

Personally yours,
Next, I designed some business cards and address labels. Here's what I did to create the business cards:
First, I found some frames that I owned and placed them on the Design Space canvas
Then I made sure the shapes could be ungrouped so that I could create two layers: one for the written part and one to coordinate as a bottom layer.
Next I choose a font and added it to the top shape. You can use
true type fonts with this machine.
And here is the finished project and some address labels. I basically
did the same thing with the labels( sorry, I had to cover up my
address.
Personally yours,
Subscribe to:
Posts (Atom)