Monday, October 21, 2013

Have FAITH


Before October slips away, I want to show my gratitude to those who are battling the enemy, "C" as well as those who have fought the battle and lost. I would also like to show the same to their dear loved ones. Thank you all for being strong and being examples that everyone can imitate. THANK YOU!

My project this month was created using the Cricut electronic cutter and the Cricut cartridge "Wall Decor and More". So here's how I got started:  using my Cricut Gypsy, I designed the project by selecting a few images from the cartridge.
I altered the size to suit my taste and then I cut all the pieces using my Cricut Expression.  I used lightweight chipboard and patterned paper.  Here's what the project looked like after I cut it:
Next is the selection of the patterned and solid color papers. I then put the project together.  The rolled flowers I added were cut from the Art Philosophy cartridge.  Now for the finished project:
The frame at the bottom can hold a small photo.  I also added a piece of chipboard so that it can stand on its own. Such a simple idea but it can also make a meaningful gift for someone. So let's continue to support and show our love.

Saturday, September 21, 2013

All Stitched Up


September is national sewing month.  My project this month centers around sewing and papercrafting.  I am an avid sewer so this is just my cup of tea.  I enjoy quilting as well as machine embroidery.  There are so many ways that sewing can be incorporated into paper crafts.  So whether you use straight or zigzag stitches, stitching on paper adds so much detail to your project.  For my project, I took a dollar store mini composition book and covered it using zig zag and straight stitching.
I took a piece of plain white paper and measured it to fit the notepad. Then I stitched strips of pattered paper together using a zigzag stitch.  I also die-cut some flower pieces and stitched them together in the middle and adhered it to the base page.  Next, I again die-cut some hearts and used a single straight stitch through the middle to hold them together.  I hot-glued the hearts to the base page.  Near the top of the base page, I cut a piece of muslim fabric and used a straight stitch to adhere it to the base page.  Taking one of my rubber stamps, I stamped a sentiment on the fabric.  Finally, I hot-glued the stitched base page to the notepad. Viola, a simple yet memorable gift idea.  So stitch up your paper projects today! Happy National Sewing Month

Sunday, September 15, 2013

Still CREATING......

Yes, I am still CREATING but I have taken a turn in the road so to speak of my creative journey.  I'm going down a path that I have traveled before.  I'm currently renewing my interest in machine embroidery and sewing.  I'm also still doing a little art journaling.  So whereas I use to frequently turn on my Cricut or Silhouette machines, I an now reaching to flip on my Janome 300E and my Brother PE770.  Poor Cricuts andCameos are sitting idle for right now but don't worry, I shall return(I promise).
The face for the art journal page on the right was created using an embroidery file. The eyes are the part   that is embroidered on fabric, then I added the other facial features. I colored in the eyes using one of my markers. In the background is one of my embroidery hoops and a monogramed circle I recently did.  To the left is a framed Bible verse that I also embroidered.  I'm having fun with my crafty detour.

Wednesday, August 7, 2013

My Creative Doings

Well, it's been a while, right and what am I doing creatively.  Not much!  So I just took a pic of what I am doing more of right now.  Chat back at you Later!


Sunday, July 21, 2013

Collecting Memories


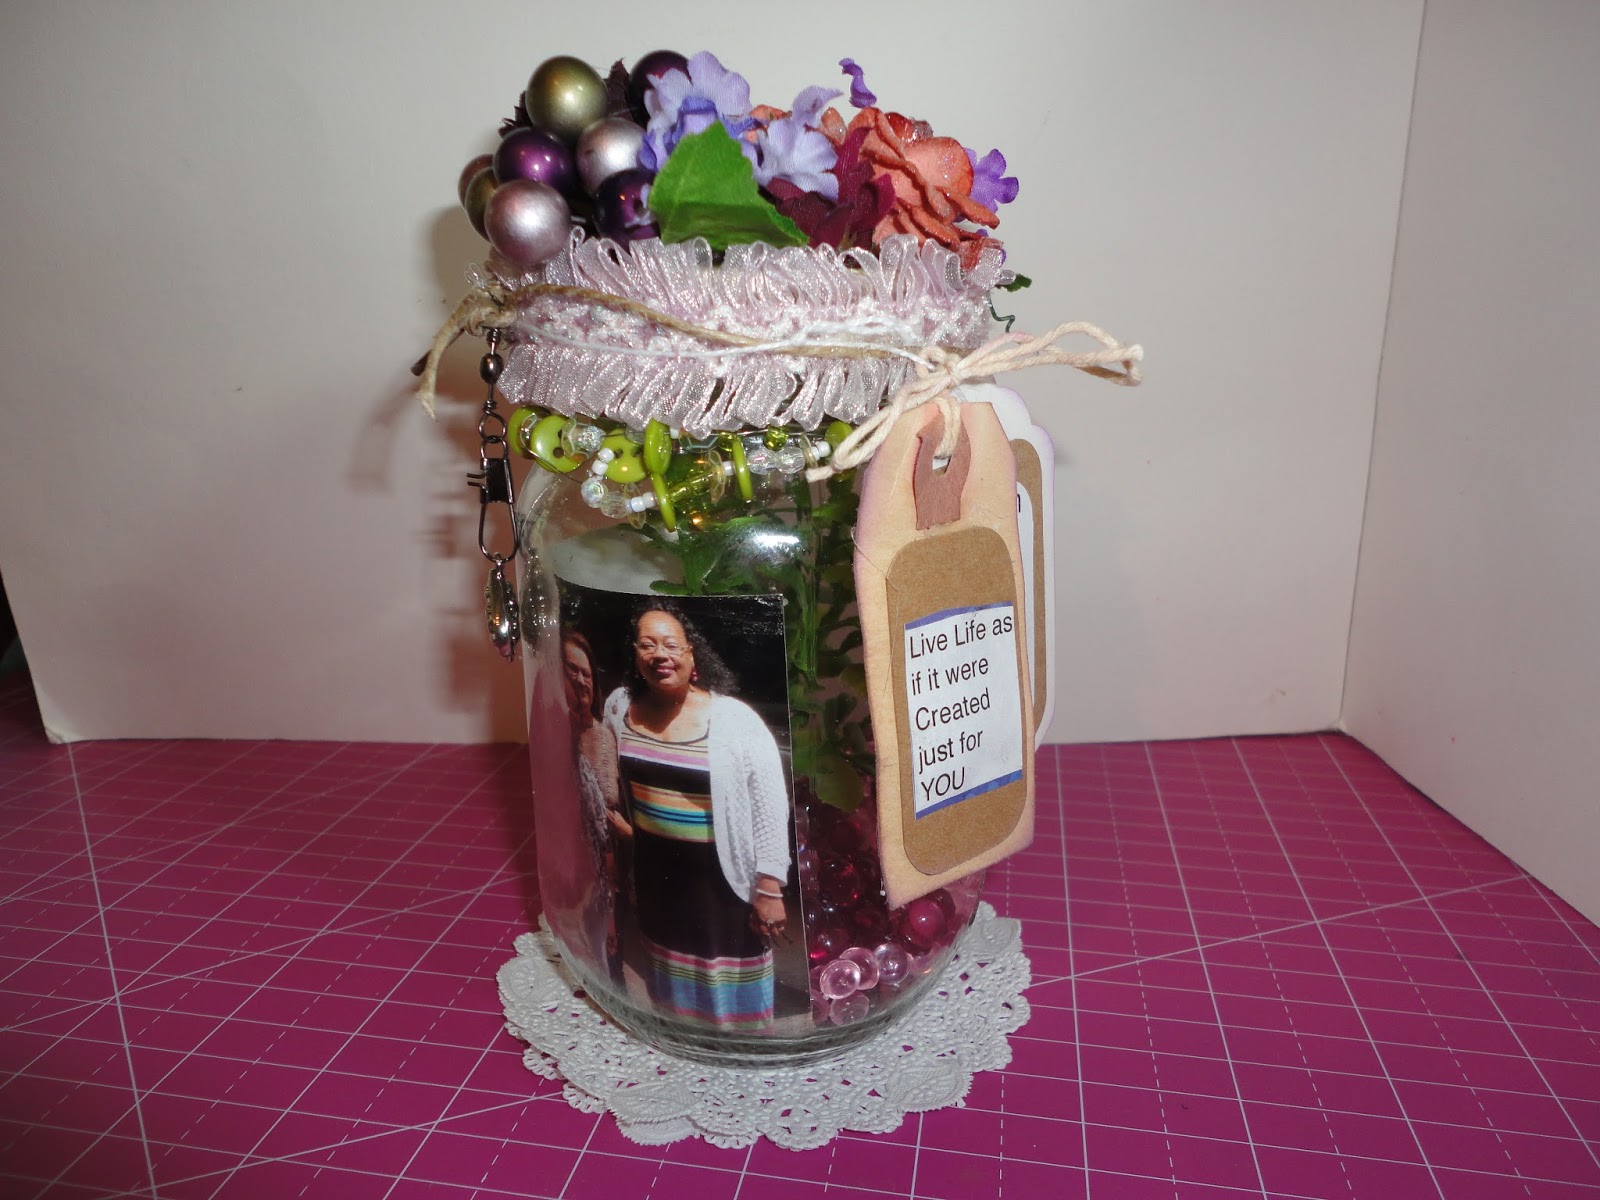
I love mason jars. No, I don't like to use them for  canning fruits or vegetables but I just like the look and structure of these amazing and practical jars.  So when I recently visited Pinterest I came across some artistic uses for these mason jars.  And you know me I love to alter things.  So, these mason jars are repurposed into memory jars that can hold your fondest memories.  My project this month was an easy one because as I said, I love mason jars and I also love to alter things.

For my project, I took a clean mason jar, added some minature pebbles to the bottom.  I then added my picture and closed the lid on my memory.lol. I added ribbon trim around the rim and on the top I layered various flowers and a contrasting beaded embellishment.  I used jute string around the rim and also some tea-stained tags complete with journaling, dates, etc. A silver heart dangles from the lid and I managed to use a rub-on that says"getaway".  For the bottom, the jar sits on a paper doily. Voila! Memories Collected!  So if you are looking for some ingenious ways to collect your memories why not try a memory jar.


Thursday, July 11, 2013

Scrappin minis using Cricut

Here are two minis I created for two of the ladies that went on the scrapbook retreat with us scrappy girlfriends.  I hope they will enjoy them and remember how much fun we had. You can find more details on my YouTube channel: FauRaiDesigns


Friday, June 21, 2013

Crafting in the Hills


Some of my scrappy friends and I spent a weekend in the mountains of Georgia, USA to do some crafting and to enjoy ourselves,  in short, to get away from the hustle and bustle of our busy lives and just relax and do what we like to do.  For some of us this was the second time around and for others it was the first time.  Whatever the case, we all had something in common and that was to let our creativity flow and learn from others.  Here are just a few scenes from our trip and the project that I shared with them:


While some of us worked into the wee hours of the morning, the rest of us just kicked backed and enjoyed the peace and quiet of the moment.  Age was no boundary as we had the company of one of our older friends.  It goes to show that creativity has no age limit.
As a friendly gesture I made gift bags for everyone.  These bags were crafted using a plain craft gift bag.  I added patterned paper to each side and then piled on the embellishments,  Inside the bag were a number of crafty gifts( ribbon, diecuts, etc.)


Have you been on a  crafting getaway  trip lately?  Why not tell us about it.  Share the joys and pleasures you had and the friendships you made.